
          
|
Straightening Warped Plastic Without DramaBy Mike Poole Sooner or later everyone obtains a kit with a badly warped part. I've noticed a trend in my limited run airplane kits for having banana-like fuselage halves. Some curve inward, some outward. While clamps and epoxy can fix anything, I wanted to develop a more refined approach to fixing the warp problem. Polystyrene is a thermoplastic because the polymers don't crystalize when cooled like most materials. Instead, the material maintains its shape through intermolecular attraction which declines as the temperature increases. There is a threshold temperature known as Glass Transition (GT) where the material becomes less springy and more rubbery. That is the magic temperature at which the polymer molecules can just begin to slide relative to one another. My approach for fixing warps in plastic is to mechanically force the part straight, then heat the plastic up to GT for a short time, then cool it off. 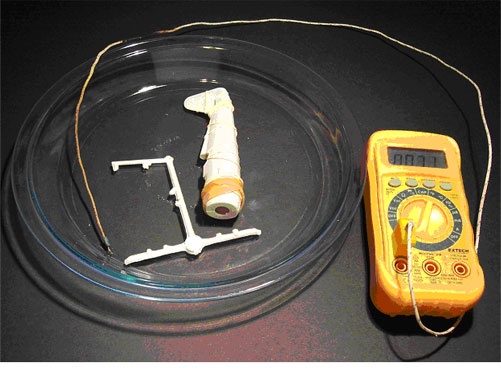 CLOSE
I use a microwave safe pie dish and a thermal probe shown in the photo with my warped fuselage twisted into the shape I desire together with a piece of the kit sprue to use as a test. (A cooking thermometer works fine also.) I heat my water up to about 170°F (77 C) in the microwave and bend the test sprue slightly against the bottom of the dish for thirty seconds. If the sprue returns to straight like a spring when I pull it out of the water I add a bit more heat and repeat the test. Once the plastic reaches GT you'll notice the sprue bends more easily and that it doesn't return completely to the original shape. I've found polystyrene begins GT between 175-195° F (79-91 C) depending on its molecular weight, plasticizers, pigments and fillers. So unfortunately, you can't rely on one temperature for all plastics. Once I have a slight but permanent bend in my test sprue, I immerse the part in the hot water for at least two minutes to let the plastic completely heat up and the molecules start moving around. At this temperature the only internal movement should be to relieve stress imposed by the rubber bands and other contrivances forcing the part into its proper shape. Once out of the hot water I drop the part in a bath of cool water to lock everything in place. 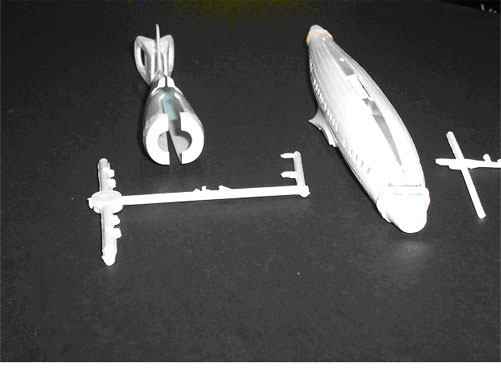 CLOSE
In the "before" pick are two fuselages before my hot water treatment. The one on the left is an LTD Models, limited run kit from Eastern Europe. It was so warped I had to use several rubber bands to get the gap to close. The plastic was hard and heavy. Its GT turned out to be 188°F (88 C). The other fuselage is a recent re-pop of a 50's era Monogram Constellation tool with a warped fuselage bordering on laughable. The plastic was light and rubbery so it only needed 180°F (82 C) to make a dramatic improvement in the fit. 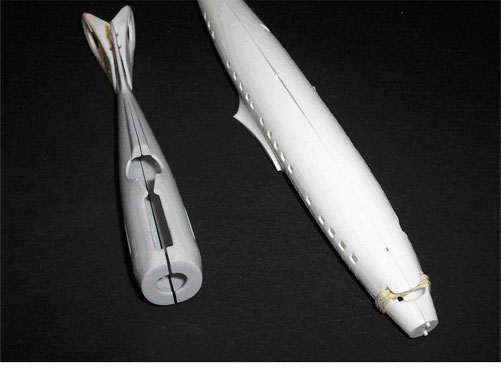 CLOSE
The "after" photo is just after being cooled and dried off. The LTD fuselage on the left still has a small gap but is easily closed with light finger pressure. The Monogram also has a tiny gap in its midsection but also closes with slight pressure. Both parts show dramatic improvement over their previous fit! This trick can easily be applied to twisted car bodies, ship hulls, or airplane wings as long as you can figure out a mechanical way to temporarily hold the correct shape. In addition to rubber bands I've used pieces of balsa wood, insulated copper wire, even tape though it tends to lose adhesion in water. When designing constraints I try to concentrate the stress in the warp, but spread the load of the mechanical constraint lest in eliminating one warp I introduce another. This technique can also be extended to resin parts but a word of caution. Resin has a much lower creep temperature than polystyrene. Just to be safe I usually start at hot tap water (110°F / 44 C) and go up gradually from there always using scrap as a test. Don't risk that rare model to guesswork. Give this a try and let me know what you think, |
© Copyright 2013, Austin Scale Modelers Society (ASMS)